Showing posts with label Landscaping. Show all posts

Monday, January 2, 2012

Landscaping our Home

Creating curb appeal and landscaping our home has been a slow process...(and finding the time to blog about it, has been even slower!).  Chris and I have been chipping away at the landscaping part of things mostly since Spring of 2011.  But we did the most work on it this fall.  There are still a few finishing touches to be done, but I am pleased with the progress.

Here's the journey...
We bought the house in Fall 2009.
 Spring 2010
 Spring 2010
 Winter 2011
(New paint job and woodwork)
Winter 2011
 Spring 2011

Fall 2011...


My goal in landscaping our yard was to make our home feel tucked-in to the landscape and feel like it has been there for a long time (which it has...but the landscape wasn't speaking to that).  Because our house is so high off the ground, it is easy for it to look out of touch with its surroundings...like someone just plopped it down.  So, we bought as many fast growing shrubs as possible, and the largest shrubs we could afford.  We planted the tree on the left corner of our home to provide shade that will give us a cozy cottage feel.  I can't wait to see as the Carolina Jasmine grows up around our porch to bring "green" up, making our home feel "tucked-in". 

Now we just have to wait for everything to grow!!!
Eventually the Taber Azaleas on both sides will grow to cover our foundation completely.  The River Birch tree will be taller than our house and will shade our front window (our bedroom).  The Caroline Jasmine vines will wrap around our columns and arch over our front porch.  The rosemary flanking our steps will grow big and create a fragrant welcoming to our home.  I'm not crazy about the two small Azaleas by the sidewalk, so I think I will move those this spring and replace them with something else.  

A few notes for impatient people like me...
I'm no gardening wizard, but here's what I've noticed at our house:
Knockout roses grow like crazy.  
My rosemary is not growing very fast.  I've heard the more you cut from it the faster it grows, though.    
Carolina Jasmine and pink jasmine grow very fast (but you have to make it very easy for them to climb...I created a trellis of nails and wire on our columns for it to fire, and fishing wire on our light post.  The confederate jasmine that I planted in a few places in our backyard is not growing very fast at all.
I also planted creeping fig on our foundation, it is growing well...but it's having a hard time clinging to our bricks...which is the whole point!  When I bought it, I got mixed advice, but one person said to cut off all existing growth when you plant it, because only the new growth will stick to the walls.  I didn't do this...I think they must have been right.    


By the way, Happy New Year!  
Thanks for checking in!

Thursday, July 8, 2010

Update on the Great Outdoors

Although at the beginning of the summer I had hopes and dreams that our house would look something like this by the end of the summer...
I've realized those dreams aren't going to happen as soon as I'd hoped.  
(Photo courtesy of many hours of photoshop and my boredom)

So, now I'm just focusing my attention on an improved version of this (reality)...

I think we've made some moves in the right direction. 
My monkey grass was getting all brown on the tips, and so I went back through and mulched it.  It has really helped because the soil isn't getting so dried up with the sun.  
Sand probably would have been better, but I had mulch on hand.  I want the monkey grass patches to grow together and fill in, and I hope the mulch doesn't prevent that.  

I tryed to clip down some of the Camellias on the left so that they wouldn't cover our window, but then I realized it was a job for a professional!  But I did make them nice and round (except a few places I couldn't reach).
I got ferns!  (Thanks Mom!)  But I can't figure out why they look so pitiful.  
They didn't look too good when I first got them, but I didn't realize that was such a bad sign.  I promise I water them!
Am I supposed to trim off the stringy parts?  Help!  Leave comments!  
I planted some Ilex Holly shrubs.  I googled them and they are supposed to get 6-8 feet in diameter!  I hope that's right, cause I planted them pretty far apart and only planted two.  
Our monkey grass is over grown and some of it needs to be dug up or killed or something.  I'm not sure what the best plan of attack is for that one yet.  Hopefully, next year we can plant some flowers to fill up this large bed.  We did have some lambs ears, but Chris yanked them up because he thought they were weeds!  But it's okay, we're even cause I sprayed round-up in some of our sod and killed it!
 My flower boxes have been blooming like crazy, but it's like the second it changed from June to July they started really struggling in this heat.  I CANNOT miss a day of watering without having dead blooms.  I under estimated what a big commitment it is to keep your flowers alive.  Watering wouldn't be such a big deal if it weren't for the fact that our water spout is wacky and I get drenched every time I turn it on.  
 This is my shady-est box and the little pink trailing flowers didn't last AT ALL!  They need a lot of sunlight I guess.  
I happened to go over to, my sister, Liz's house at just the right time this week, because she had put this rug on the street to be thrown out!  Makes a perfect little porch rug for us, and it's indoor/outdoor.  
 The ferns and the rug make our porch a cozy little late-evening hangout spot.  
It was so cozy, that somebody wasn't going to get up anytime soon...so I seized the opportunity for live models.  
This crepe myrtle is blooming like crazy in our side yard!
Unfortunately the little tree in front of it looks dead as a doornail.  
I love how the blooms arch over our gate, and I love seeing them out our window.  

I think soon I'll try and paint our pitiful rod iron columns so they'll disappear blend in with the house more and maybe paint our front door a fun color.  But if I paint the front door a bold color, I can't decide what color our shutters should be.  Something to ponder...

Here's the recap...

Before:
Lately:
Fantasy:

Thanks for reading.


Friday, June 18, 2010

Backyard Planter

Sometimes my mom will get me something and say "I got you this _____.  It should go in the _______, next to the ________, on top of the _________ that I got you. 
Usually it works out, because it'll be something that wasn't really on my radar at all, and so if she wants to contribute it's just an added bonus. 

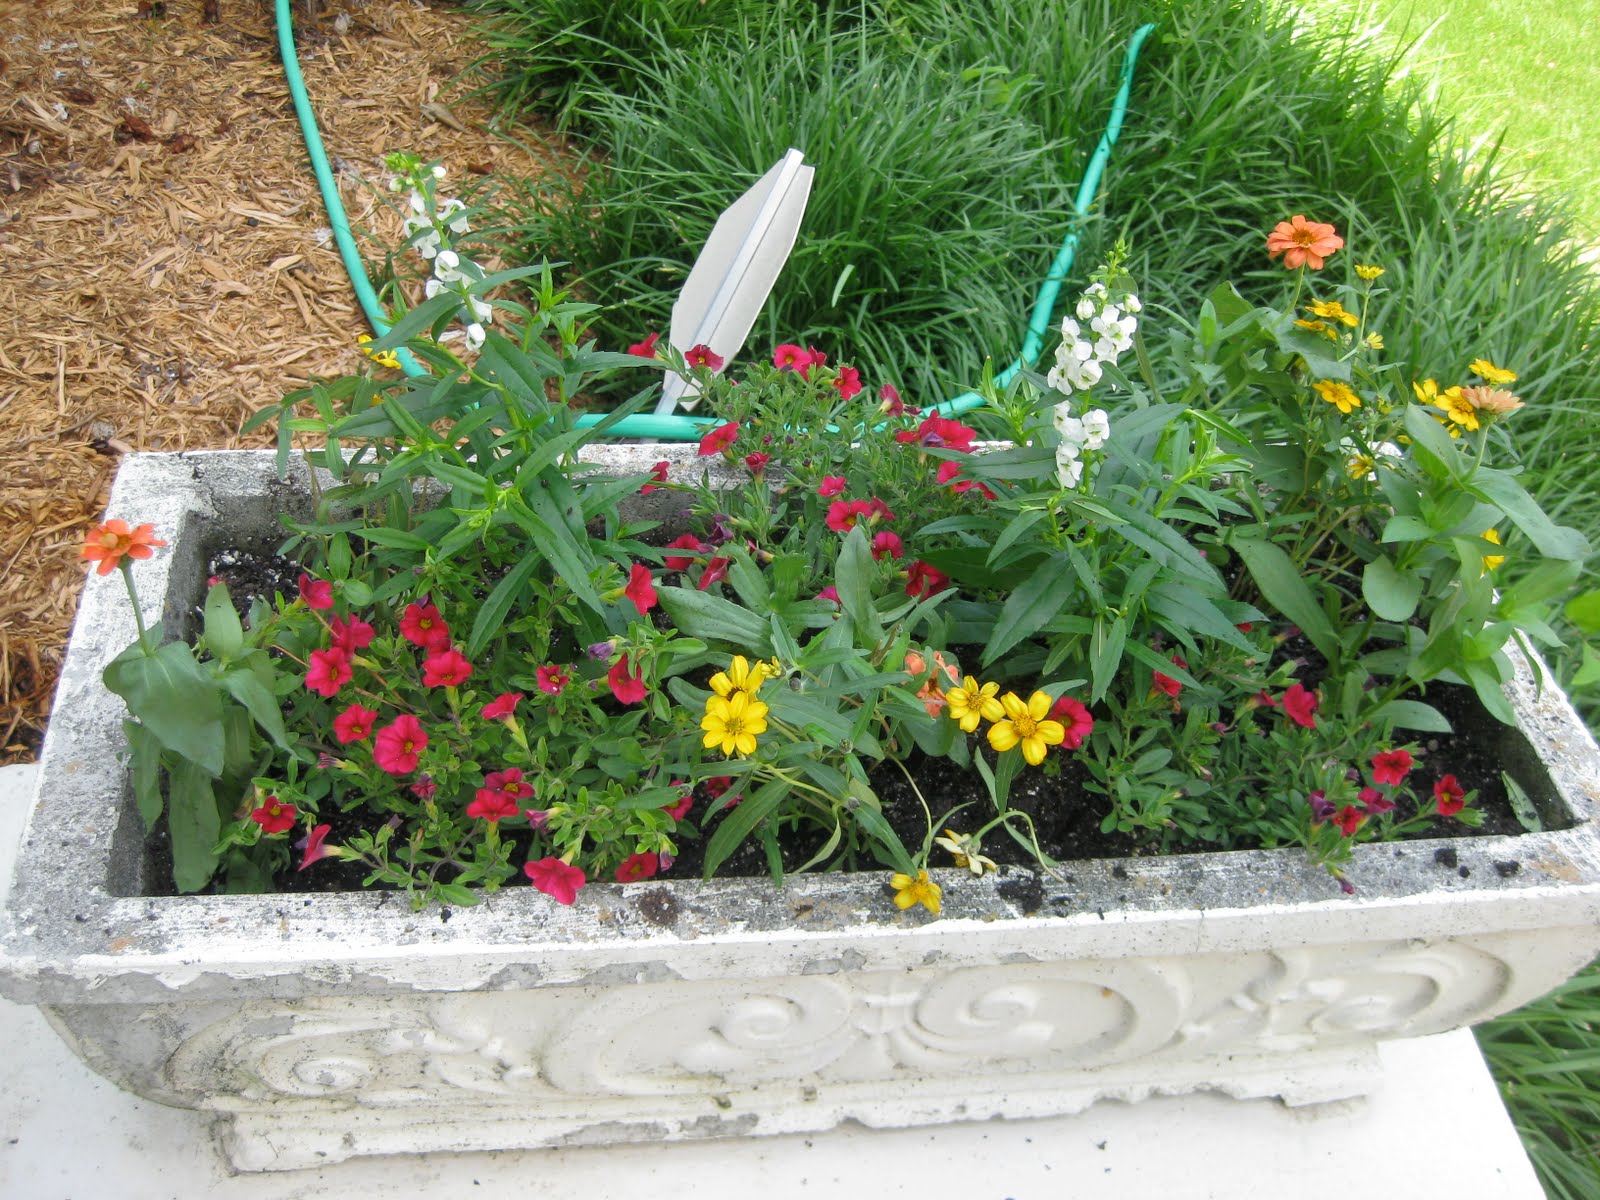
She brought over this planter (specifically intended to go in our backyard on our patio).
The next day she dropped off the exact plants she wanted me to plant in it. 
So all I had to do was get to work...
BeiBei was getting SO EXCITED about her new flower buffet! 
You see, I probably could have told my mother that BeiBei MIGHT destroy this.  But there's a famous expression in our family, "You didn't Ask."
Hopefully, BeiBei will be able to resist, cause isn't it fun & pretty...?
Good Job, Mom!  Thanks for the backyard addition. 
I'll post another picture once it's grown a bit.

Tuesday, June 8, 2010

A Free Fix to an Ugly Problem

Observe our house.  Now notice our walkway.  Now notice the horrid red brick border that lines it.
Now, let your eye search for anything else in our house that matches these bricks.
My point exactly.  Now, point be known...I am not a fan of the exterior look of our house.  There is MUCH to be done.  But for now, I'm looking for a few little FREE things I can do to spruce it up.  

I learned online that there are actually lots of plants that you can "transplant".  You can borrow some from a friend, or from other places in your yard, plant them in new spots then just let them spread and fill in.  I learned the monkey grass might be the easiest of all transplants, since it grows like a weed anyway.

Day 1
Within 30 minutes of gathering this information, I was in my front yard digging up these aweful bricks.  This was my progress after about an hour, before it started raining and I had to call it quits.  

Day 2
I got back at it the next day.
Until I met...and conquered these two beasts (which took about an hour)...
These two chunks, unlike the rest, were actually still cemented to the walkway and the bricks were still cemented to each other.  But with the help of a rock cutter (orange tool above) and a crow bar, I prevailed.  

I stirred up the soil, where the bricks had been and soaked it with water.    

So then I started digging up huge chunks of monkey grass.  I THOUGHT this part would be easy.  It was not.   But I got the hang of it, with a little help and instruction from Chris on how to effectively operate a shovel.  I made sure to get as much of the root ball as I could, but from what I read, it's okay if you can't get it all.

Then I started breaking it up into handful size chunks of grass and root.

I planted my handfuls about 6 inches apart.

All in a days work.  Here's how it look at the end of Day 2.  
I think this picture is a great side-by-side comparison for before and after the monkey grass.  She how on the left side the monkey grass leads your eye up the walkway, around and up to the house.

Day 3
More hard work.  I slaved away on Memorial Day.  Watching the neighborhood families come and go from the pool.  But I did it!  And it was worth it.  

Before:
After:
Once the monkey grass fills in and gets trimmed back a little, I think it's gonna look great.  

At some point, hopefully, we'll plant some shrubs on the right, cut back those camellias on the left and try to get something symmetrical happening with the rest of our landscaping.  It's a start though right?


Thursday, June 3, 2010

A little late spring planting...

I hadn't really caught the planting bug this spring, but then I joined in just in the nick of time in the last week of spring (May=Spring, June=Summer), with a little help from Mom.  Our garden needed major work.  See garden in exhibit A.

Exhibit A
See, I was perfectly content to just leave our garden this way, since Chris has inflicted a temporary no-spend policy on my house projects.

Then Mom swooped in to save the day with a casual email.  "Sara, I bet your pansies have been dead for a while now, do you want me to get you some flowers for your flower boxes?"

I promptly replied, "Yes!"  Thinking to myself, "If you're buying I'm game!"

So we met at the nursery a few days later and came home with these...
They are...hmm...let's see.
Serena White Angelonias (tall white ones)
Caberet Red Calibrachoa (trailing red ones)
Crystal Mix Zinnias (yellow ones)
Profusion Apricot Zinnias (orange ones)
I'd never planted, well anything, before so my mom showed me how it's done...


Here's the how-to on planting flower boxes, from one dummie to another.  

1. Get the soil good and loose by stirring it up.

2. Soak the soil with water until it runs out the bottom.

3. Decide where you want your plants to go.  (We went tallest in the center and filtered out to the "trailing" flowers (flowers that will grow to hang over edge) last on the outside.  

4.  You dig a little hole for each flower and place it in, only as deep as the roots.  Don't submerge the green parts in the soil, because they will rot (whatever that means).  


5. Wait till you get everything situated where you want it.  You may have to move things around several times.  Then pack it all down.

6.  Water gently one last time.  

Here's the finished product...


Before:
After:
Chris always tells me I'm a messy cook.  I guess I'm a messy gardner too!
After clean up:
(try to ignore the dishwasher sitting on our porch waiting to be sold)
After a few days of growing:
Luckily, I planted right before several days of rain so they are getting lots of water.

I'll keep you posted.  Thanks for reading.  
(More to come on another little planting project)


LinkWithin

Related Posts with Thumbnails