Thursday, July 29, 2010

Mountain Getaway

We had a blast this past weekend with some old friends.  We went up to Chris's grandmother's mountain house near Ashville, NC.  It was great to relax and be with friends.  As much as I love the beach, when I'm at the beach I feel pressure to be by the water and in the sun.  And sometimes sitting in 90 degree weather, remembering to flip and reapply sunscreen...can feel like a lot of work, when I'd rather be inside in my pjs.  It was nice to be in the mountains, and not really have pressure to do...anything at all.  We slept in, lazied around the house, rode around on the golf cart, and did some afternoon trail/creek walking.  The boys played golf one day, and we went into town one night for dinner.  It was fun...thanks Gannons and Clintons for joining us!
Of course, we took BeiBei with us, and she had a blast!  She frolicked in the creeks, hiked up the waterfall, and generally just LOVED being around 6 people at once...even though one of them is a dawg-hater.    
 The girls stayed behind and watched while the guys and dog hiked the falls.  
The mountain house is basically right on the golf course, and so it was fun for the girls to catch up with the guys for a golf cart ride on the last few holes.  
Thanks for reading!

Monday, July 26, 2010

Made-em-myself Curtains

After getting a great deal on some great printed fabrics from Premier Fabrics in Madison, MS ($9.99 per/yard)....I got to work making some cafe curtains for our living room and dining room.

Here are my fun fabrics.  


Here are the before and afters for the living room...

the LIVING ROOM
Before:
(curtain panels from ikea, white faux wood blinds, jumbled tv wire situation)
After:
I removed all the faux wood blinds, and put bamboo blinds on the large window.  (Woop woop for the bamboo blinds garage sale steal!)  I added the chevron print cafe curtains to the large window, which are hung on a oil rubbed bronze metal cafe curtain rod, with clip-on cafe rings.  So far I haven't been hugely happy with the metal rings, because the curtains move around a little TOO much, and it's hard to ever spread them evenly.  The metal also doesn't have the homeyness that I want in our living room.   I may go back later and try to figure out a different treatment at the top of these panels.  For my little window, I used a floral print that matches the cafe curtains I made for the the dining room.  I think this is a good way of relating the two conjoining rooms, and not letting the living room get too matchy-matchy.  

Before:
After:

Before:
After:
Dressing up this window really brought some color to the mantle, which is much needed since we chose to put our tv over the mantle instead of artwork.  I want this window to draw the eye, instead of the tv.  

There have been a few other improvements as well...
Before:
(one pretty lamp)
After:
(two is bettah)

Before:
(jumbly tv mess)
After:
(wireless wonder)
Way to Go, Chris!  He worked so hard on this.  All the wiring goes through the wall, up through the ceiling, and down into a hall closet where all of our components live, i.e. W.C.C. (Walker Command Center, figure A).  We use a radio frequency remote to control everything.  

figure A

So that's the living room.

As for our dining room...
Our Dining room really needs some help.  I'm just not happy with it lately.  I'm brainstorming completely re-arranging it.  But here are the curtains at least.

Before:
(Again, curtain panels are cheapo from IKEA)

After:
I opted for no blinds instead the white faux wood blinds.  I'm hoping to stumble upon another set of bamboo blinds for cheap!  I used pinch pleat hooks and tape to make these pinch pleat curtains, which was an awesome cheater move!  I left the cafe curtains a little long for a more luxurious feel, since there is nothing below them.  


  ************************
I'm very pleased with the results from my little curtain project.  I went ULTRA cheap, with my IKEA curtain panels, and so I think adding interest with cafe curtains is a great way to get a big effect on a budget.  
So, if you're on a budget, use your cheaper fabric on your panels (more yardage required), and then you can go back later and use your nicer fabric to spice things up with some accent curtains (less yardage required).  Then later, as another thought, I hope to add some trim to my panels for more interest.  

I have loved having these cafe curtains because it allows us to not use our blinds at all.  So we can look out our windows and see the outdoors, yet we have enough privacy that anyone outside our house could only see us from the neck up.  So that's right, Chris...you CAN walk around in your boxers now without me jumping up to shut all the blinds!  

Thanks for reading.  


Monday, July 19, 2010

Hide and Seek

I often find Bei like this...
She loves to be under our bedskirt or curtains.
Tired of seeing pictures of my dog?
Sorry, but no one forces you to read this blog!  Do they?
*If someone is forcing you to read this blog, please report your complaint to 1-877-STOP-FORCING-ME.

Sunday, July 18, 2010

A peek at what's to come...

This weekend I've been painting some things on the outside of our house!
I'm excited about the progress.  I'll post complete before and afters when I finish.

For now...here's a sneak peek...
Before...
In the works...

Things are looking a little lighter and brighter around here, and I like it!

Thursday, July 15, 2010

Extra! Extra!


I was interviewed last week by Elizabeth Bernstein for her column in the Wall Street Journal.
She wanted to know all my opinions on the stock market and the economic downturn.

Just kidding.

But I was interviewed.

Anyone who knows me, knows I am QUIRKY.  Well, I was interviewed for the life and style column about how my quirky eating habits have affected my relationship with my husband, Chris.

Click here to read the article, and it is also printed in the paper from Tuesday, July 13 2010.

And to clear the air, I'm not really "passing Chris" in variety of foods, we have just noticed that I like bolder flavors & combinations than he does.  But her version makes for a better story!  :)

Wednesday, July 14, 2010

Rockin' Goldendoodle

I stumbled across this pic on the web, which coincidentally was taken by my old friend, Troy, that I met when I lived in Los Angeles.  I love this pic, so I just had to share...

Photo by Troy Grover at www.troygrover.com

Though this look is pretty awesome, I don't think BeiBei will ever be sporting that because we cut her bangs so she can see!  She has huge almond eyes and I don't want to hide them or give her a life of blindness.  But this dog is super cute!

Here's some recent pictures of the Bei, herself, cause you know I can't resist...
These are her two favorite spots in the house.
 Sleeping bear...


Tuesday, July 13, 2010

Pom-Pom Euro Shams


In case you're wondering how I made the Euro shams in our guest bedroom, I'll tell ya!

Okay, I'm not real sure about how to successfully do this "how-to" thing, but I'll try.

To make two Euro Shams you'll need:
           - Two euro sham pillow forms.  (about 26 x 26)

           - 1.5 yds fabric for the front of pillow (fabric A) (or about a yard of fabric if fabric width is 54 in. or greater).  I would suggest something upholstery weight, but it's not mandatory.

          -  2 yds fabric for the back of the pillow (fabric B) (If you use something really cheap, like unbleached muslin, like I did, you may want to think about doubling the amount and double layering it for durability)

          - 6.5 yrds of pom-pom trim (or other trim of your choice)

          - Thread that matches your back pillow fabric


Okay, here goes nothin...
(To make things simple these instructions are for 1 euro sham.  If you are making two, do everything twice!)

1. Cut out a 27"x 21" and a 27"x11" piece of Fabric B.

2.  Iron them (and starch if you think your fabric needs a little extra help).
3.  Fold under 1" on the 1 long side of each peice and pin. Blind hems are too much trouble in my opinion so just make sure your thread matches and just sew a straight light to hem them under.  
4.  Cut out a piece of Fabric A that is  27" x 27".
5. Lay out your hemmed pieces of Fabric B, both pieces facing right-sides-together with your square of Fabric A.  The hemmed edges of Fabric B should be towards the center, and the panels should overlap.    

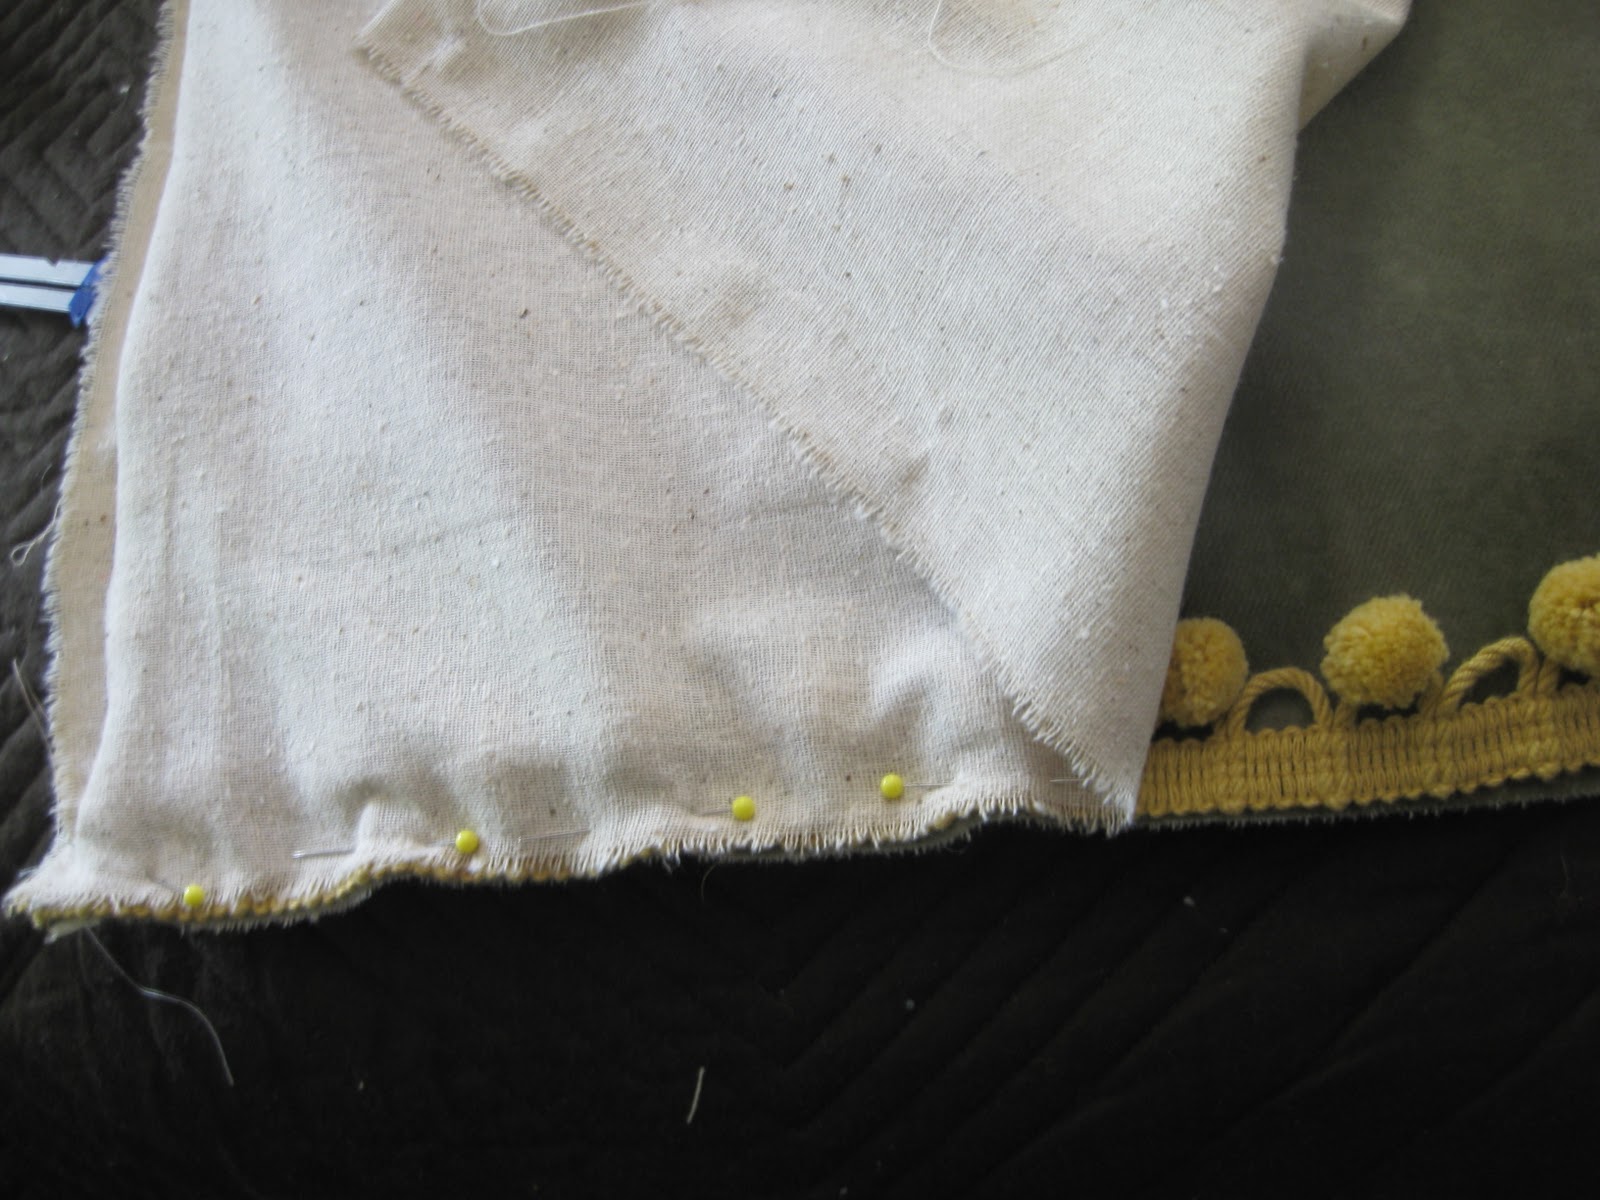
6. Pin a 27" strip of the trim in between the two pieces, lining up all three edges.  The decorative part of the trim should be towards the center of your square.  
7. Adjust your needle to the left.  
 8.  Sew along the edge of your fabric, the width of the presser foot is probably a good guide for how wide your seam allowance should be, but if not you're seam allowance should be the same as the wide of the tab of your trim.  Pull out the pins as you go so you don't run over them.  Carefully watch to make sure all three edges remain lined up as you sew.
 9.  It should look something like this after you've sewn your seam.
 10.  When you turn it right-side-out your seam should look like this.
11. Repeat along all four sides of the square, so that one of the pieces of Fabric B is overlapping the other to create an opening to slide your pillow form in.  


12.  Clip the corners, without clipping through your seam.  
13.  Turn right side out and Voila!  (Or if you're like me, this is the point when you discover something has gone tragically wrong and you have to rip out several seams and do them again).  Stuff your pillow form inside and enjoy!


Monday, July 12, 2010

Two Years and Counting...

Happy two-year anniversary, Chris!
I love you!  Thank you for being a wonderful husband!

Here are a few of my favorite pictures from our wedding...


Here are a few starry-eyed honeymooner pics...


Happy Anniversary, Chris!
(He decided to try and fit in with the Euro's at our resort and sported these swim trunks to embarass me.)  


LinkWithin

Related Posts with Thumbnails