Tuesday, July 13, 2010

Pom-Pom Euro Shams


In case you're wondering how I made the Euro shams in our guest bedroom, I'll tell ya!

Okay, I'm not real sure about how to successfully do this "how-to" thing, but I'll try.

To make two Euro Shams you'll need:
           - Two euro sham pillow forms.  (about 26 x 26)

           - 1.5 yds fabric for the front of pillow (fabric A) (or about a yard of fabric if fabric width is 54 in. or greater).  I would suggest something upholstery weight, but it's not mandatory.

          -  2 yds fabric for the back of the pillow (fabric B) (If you use something really cheap, like unbleached muslin, like I did, you may want to think about doubling the amount and double layering it for durability)

          - 6.5 yrds of pom-pom trim (or other trim of your choice)

          - Thread that matches your back pillow fabric


Okay, here goes nothin...
(To make things simple these instructions are for 1 euro sham.  If you are making two, do everything twice!)

1. Cut out a 27"x 21" and a 27"x11" piece of Fabric B.

2.  Iron them (and starch if you think your fabric needs a little extra help).
3.  Fold under 1" on the 1 long side of each peice and pin. Blind hems are too much trouble in my opinion so just make sure your thread matches and just sew a straight light to hem them under.  
4.  Cut out a piece of Fabric A that is  27" x 27".
5. Lay out your hemmed pieces of Fabric B, both pieces facing right-sides-together with your square of Fabric A.  The hemmed edges of Fabric B should be towards the center, and the panels should overlap.    

6. Pin a 27" strip of the trim in between the two pieces, lining up all three edges.  The decorative part of the trim should be towards the center of your square.  
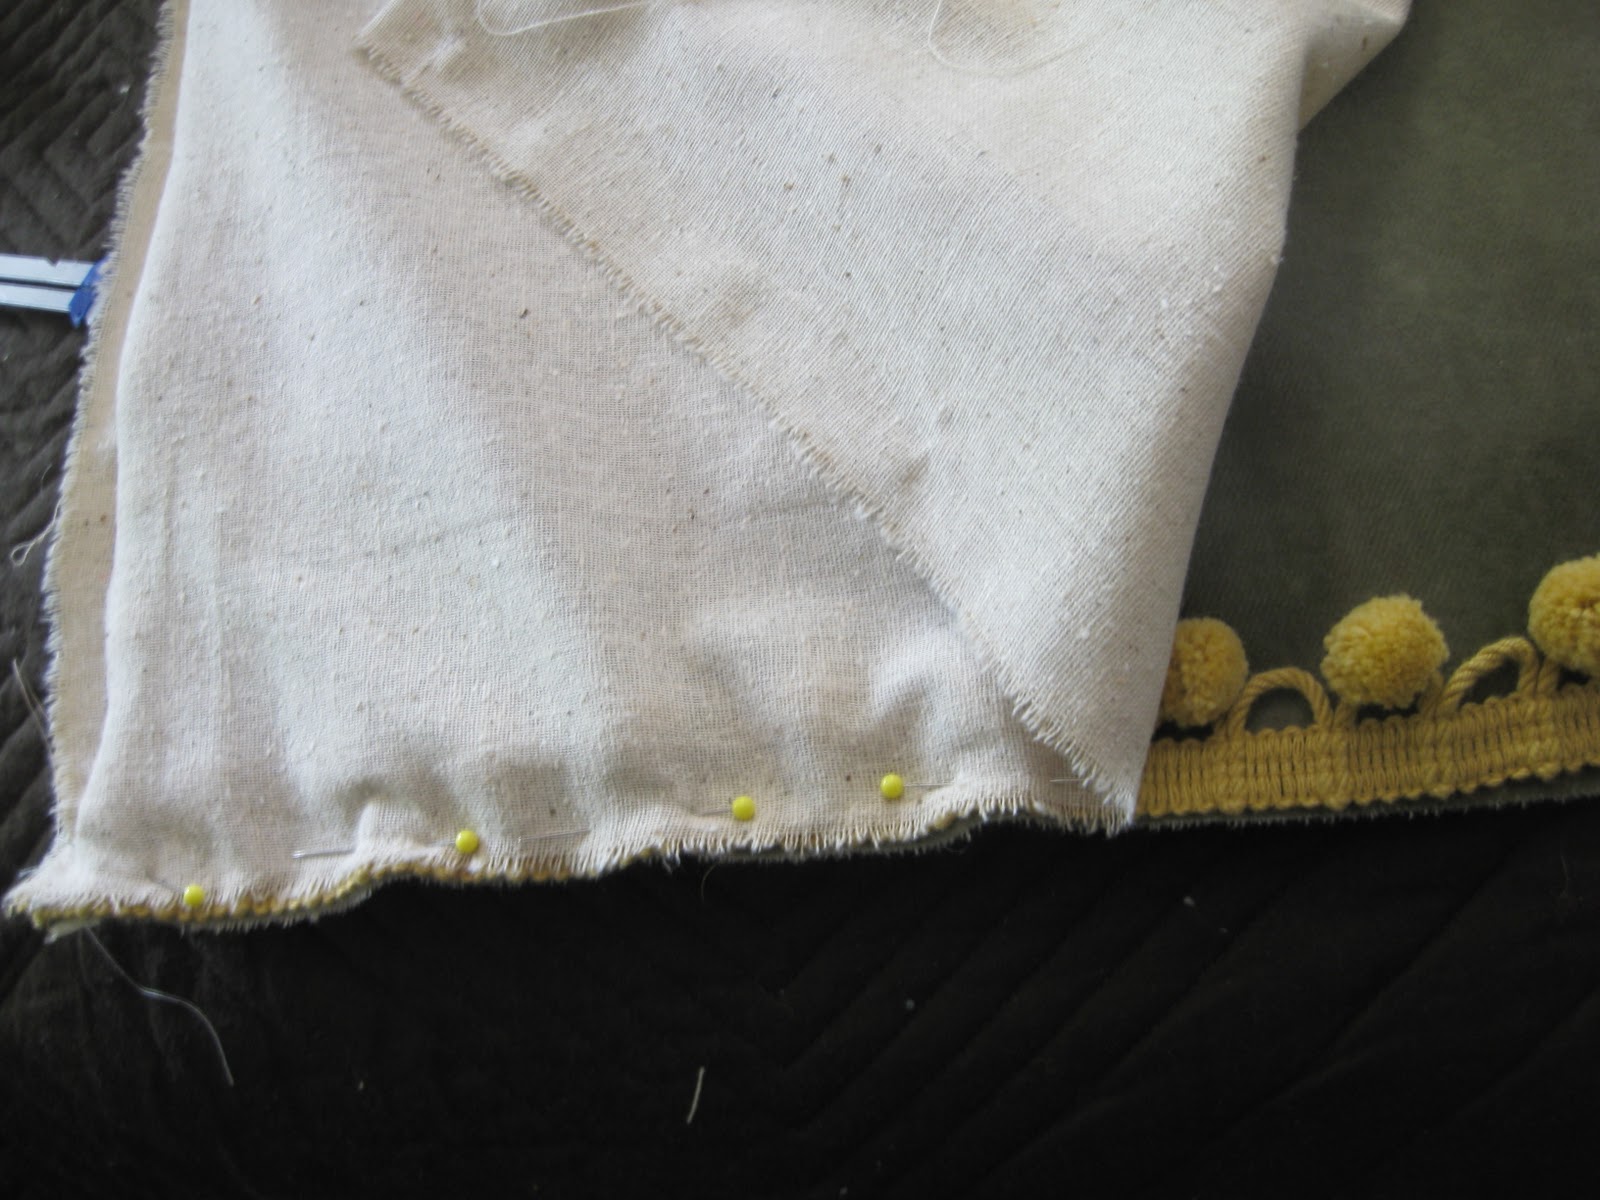
7. Adjust your needle to the left.  
 8.  Sew along the edge of your fabric, the width of the presser foot is probably a good guide for how wide your seam allowance should be, but if not you're seam allowance should be the same as the wide of the tab of your trim.  Pull out the pins as you go so you don't run over them.  Carefully watch to make sure all three edges remain lined up as you sew.
 9.  It should look something like this after you've sewn your seam.
 10.  When you turn it right-side-out your seam should look like this.
11. Repeat along all four sides of the square, so that one of the pieces of Fabric B is overlapping the other to create an opening to slide your pillow form in.  


12.  Clip the corners, without clipping through your seam.  
13.  Turn right side out and Voila!  (Or if you're like me, this is the point when you discover something has gone tragically wrong and you have to rip out several seams and do them again).  Stuff your pillow form inside and enjoy!


Monday, July 12, 2010

Two Years and Counting...

Happy two-year anniversary, Chris!
I love you!  Thank you for being a wonderful husband!

Here are a few of my favorite pictures from our wedding...


Here are a few starry-eyed honeymooner pics...


Happy Anniversary, Chris!
(He decided to try and fit in with the Euro's at our resort and sported these swim trunks to embarass me.)  


Thursday, July 8, 2010

Update on the Great Outdoors

Although at the beginning of the summer I had hopes and dreams that our house would look something like this by the end of the summer...
I've realized those dreams aren't going to happen as soon as I'd hoped.  
(Photo courtesy of many hours of photoshop and my boredom)

So, now I'm just focusing my attention on an improved version of this (reality)...

I think we've made some moves in the right direction. 
My monkey grass was getting all brown on the tips, and so I went back through and mulched it.  It has really helped because the soil isn't getting so dried up with the sun.  
Sand probably would have been better, but I had mulch on hand.  I want the monkey grass patches to grow together and fill in, and I hope the mulch doesn't prevent that.  

I tryed to clip down some of the Camellias on the left so that they wouldn't cover our window, but then I realized it was a job for a professional!  But I did make them nice and round (except a few places I couldn't reach).
I got ferns!  (Thanks Mom!)  But I can't figure out why they look so pitiful.  
They didn't look too good when I first got them, but I didn't realize that was such a bad sign.  I promise I water them!
Am I supposed to trim off the stringy parts?  Help!  Leave comments!  
I planted some Ilex Holly shrubs.  I googled them and they are supposed to get 6-8 feet in diameter!  I hope that's right, cause I planted them pretty far apart and only planted two.  
Our monkey grass is over grown and some of it needs to be dug up or killed or something.  I'm not sure what the best plan of attack is for that one yet.  Hopefully, next year we can plant some flowers to fill up this large bed.  We did have some lambs ears, but Chris yanked them up because he thought they were weeds!  But it's okay, we're even cause I sprayed round-up in some of our sod and killed it!
 My flower boxes have been blooming like crazy, but it's like the second it changed from June to July they started really struggling in this heat.  I CANNOT miss a day of watering without having dead blooms.  I under estimated what a big commitment it is to keep your flowers alive.  Watering wouldn't be such a big deal if it weren't for the fact that our water spout is wacky and I get drenched every time I turn it on.  
 This is my shady-est box and the little pink trailing flowers didn't last AT ALL!  They need a lot of sunlight I guess.  
I happened to go over to, my sister, Liz's house at just the right time this week, because she had put this rug on the street to be thrown out!  Makes a perfect little porch rug for us, and it's indoor/outdoor.  
 The ferns and the rug make our porch a cozy little late-evening hangout spot.  
It was so cozy, that somebody wasn't going to get up anytime soon...so I seized the opportunity for live models.  
This crepe myrtle is blooming like crazy in our side yard!
Unfortunately the little tree in front of it looks dead as a doornail.  
I love how the blooms arch over our gate, and I love seeing them out our window.  

I think soon I'll try and paint our pitiful rod iron columns so they'll disappear blend in with the house more and maybe paint our front door a fun color.  But if I paint the front door a bold color, I can't decide what color our shutters should be.  Something to ponder...

Here's the recap...

Before:
Lately:
Fantasy:

Thanks for reading.


Wednesday, July 7, 2010

A Bird's Eye View

We had fun watching Fourth of July fireworks with friends at the top of the City Federal building in downtown Birmingham!  Thanks for inviting us, David!


I hope you had a great fourth of July, too!


Monday, July 5, 2010

Sewing, Sewing...

I've been busy all weekend sewing my new cafe curtains!  I can't wait to post pics when they are finished!

Here are my fabrics...


Friday, July 2, 2010

All shiny and (almost) new: Washer & Dryer

There is a multi-part trade/shuffle of appliances happening in our household.

If you read the post "All shiny and (almost) new:  Dishwasher" then you might be familiar with these trades.

In short, Chris works for a moving company, so he is often first to know when their customers want to sell or give anything away.

One lady was selling a bunch of state of the art appliances for dirt cheap.  So we bought her dishwasher and refrigerator.  We have already installed the dishwasher, and boy does it look sharp!

We traded the fancy built-in refrigerator (it was a little over-the-top for our kitchen) for my sister's 1 yr old washer and dryer, since they were moving.

Here's the old stuff:


Beautiful aren't they?

The washer and dryer are in working condition, but the load sizes are really small.  We found out our washer is from 1992!  Nobody wants to buy it, so we're just gonna take it to goodwill.  Chris even took it to this little old lady's house and installed it for her.  After it was installed, she opened it up and looked inside and said, "That's too small, I don't want it!"  
Chris:  "Are you sure?  What if I give it to your for cheaper?"
L.O.L. (little old lady):  "No!  I don't want it!"
Chris:  "Well, I'll just give it to you for free then."
L.O.L.:  "No, please just take it away!"

So Chris proceeded to move the thing back out of her house and down the stairs, and knocked over a statue on his way out!  What a pain!  

After we moved them out, it was pretty nasty under there so I did a little cleaning.  I'm not really a clean freak, but I always clean under things when we move them, because when else are you gonna get the chance to get it clean?  I even finished painting the trim back there, just for good measure.


But every good projects comes with a really good mess in our house...


But it was all worth it, for some nice results.  

Here's the new stuff...

Nice and shiny!  And they have lots of good buttons and functions.  

I have to say, I've always dreamed of having these in our house...
But I don't think that was really in the cards for us anyway.  
We're excited enough just to have something from the new millennium, much less 2009!

We have hopes to enclose our washer and dryer to make a laundry room, so it won't matter than they aren't stainless like the rest of our appliances (eventually) will be. 


Here's the recap.

Before:

After:


Now, on to the next part of our appliance trade off!  When my sister gets the fancy built-in refrigerator installed that we traded them, we'll drive over to MS and get the stainless steel fridge that is in their house now and we'll give them our white vinyl fridge to go in their garage.  Yipee!!!

LinkWithin

Related Posts with Thumbnails